The bud graft or chip budding

Chip budding is a method of propagating trees by grafting a growth bud from a tree of your chosen variety to a rootstock.
Download our pdf on how to Bud graft
Timing
Bud grafting, or chip budding, is done in the summer, between July and September so that the bud has enough of the growing season to heal into the rootstock, but reaches winter dormancy before it can grow. This means that you can chip bud any rootstocks where spring bench grafts have failed, giving you another stab at propagation success in the same year.
Selecting suitable buds for grafting
As with bench grafting, you want to select your bud material from twigs grown in that year. Cut off a scion of this year’s growth, and cut off the leaves (leaving the leaf stalks), this stops the scion drying out by losing water through leaf transpiration.

Cut off the leaves, leaving the leaf stalks
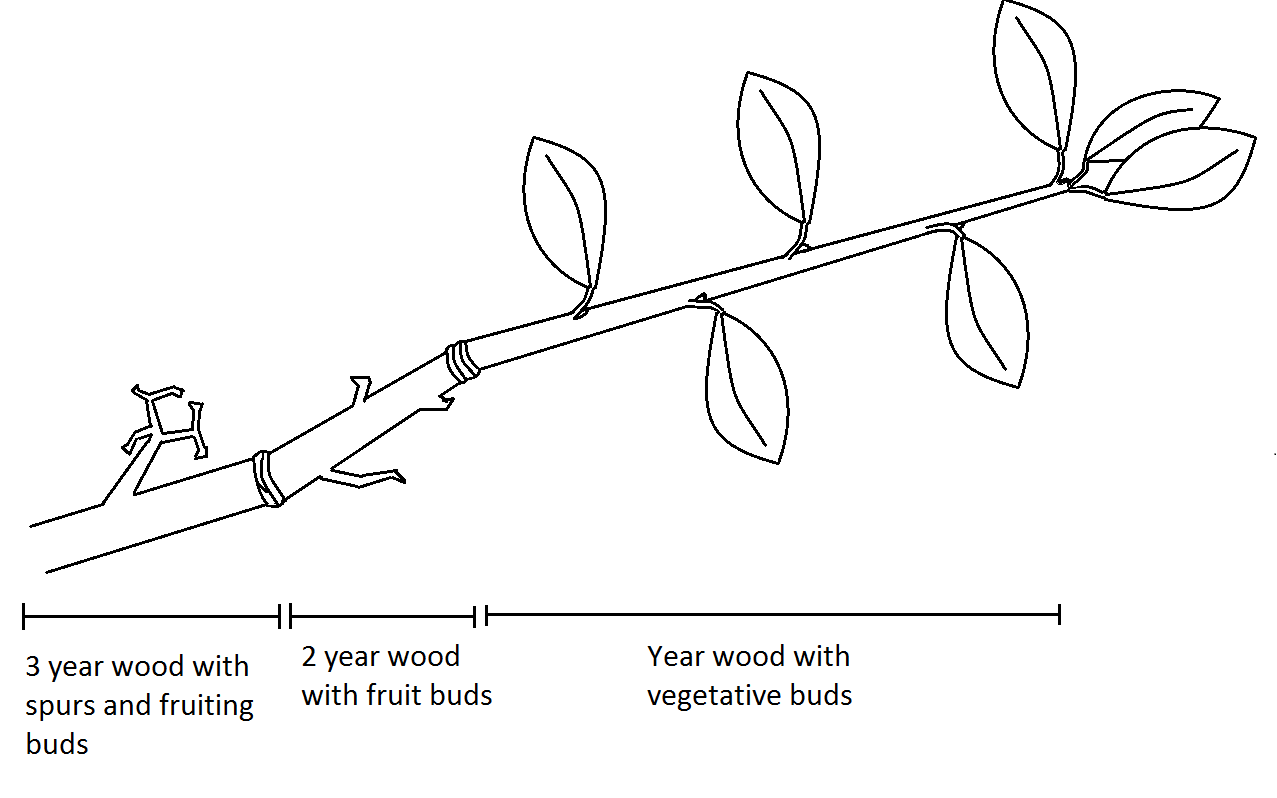
Find this year’s growth by following down a newly grown twig from the tip until you find a ridged band. This marks the beginning of two-year wood. Cut it off around this point. On a poorly growing tree there might not be much year-growth so just select the best you can find. Apical buds at the end are no use for the bud graft.
Bud grafting and binding
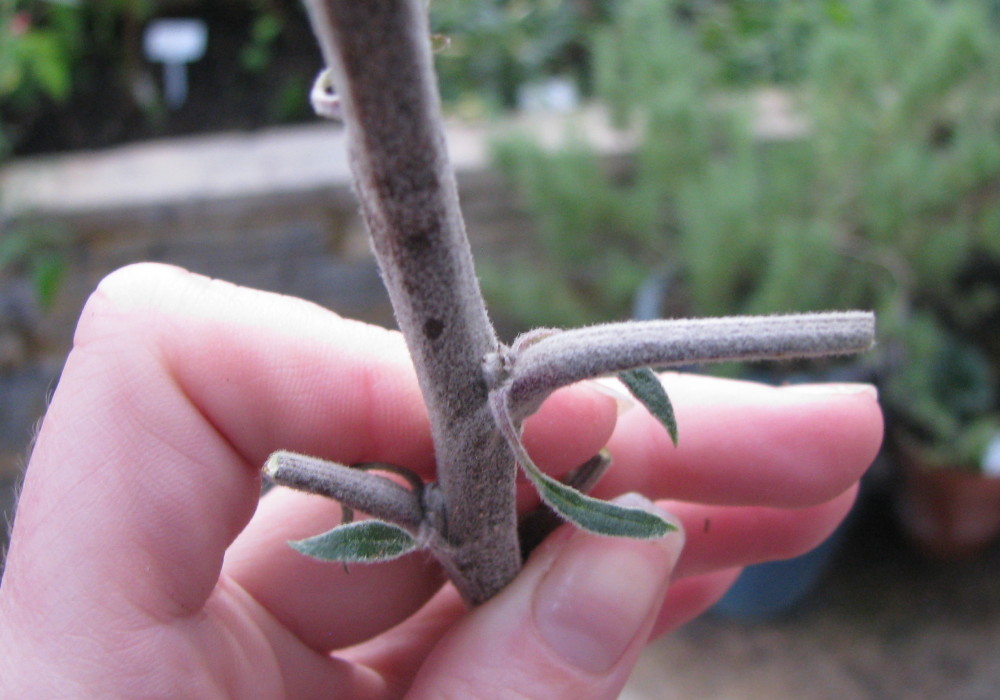
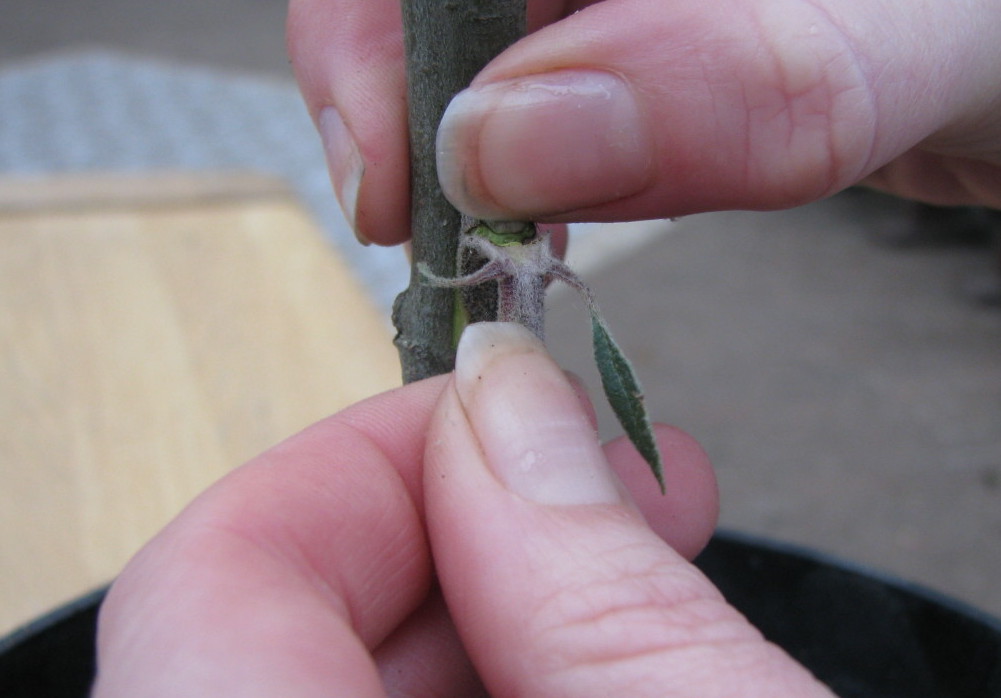
- You will find the buds that you are going to graft to your rootstock between the leaf stalk and the stem. It is best to choose a bud from the central section of this year’s growth. Buds close to the base are woodier and more difficult to cut off, buds near the tip will be less developed.
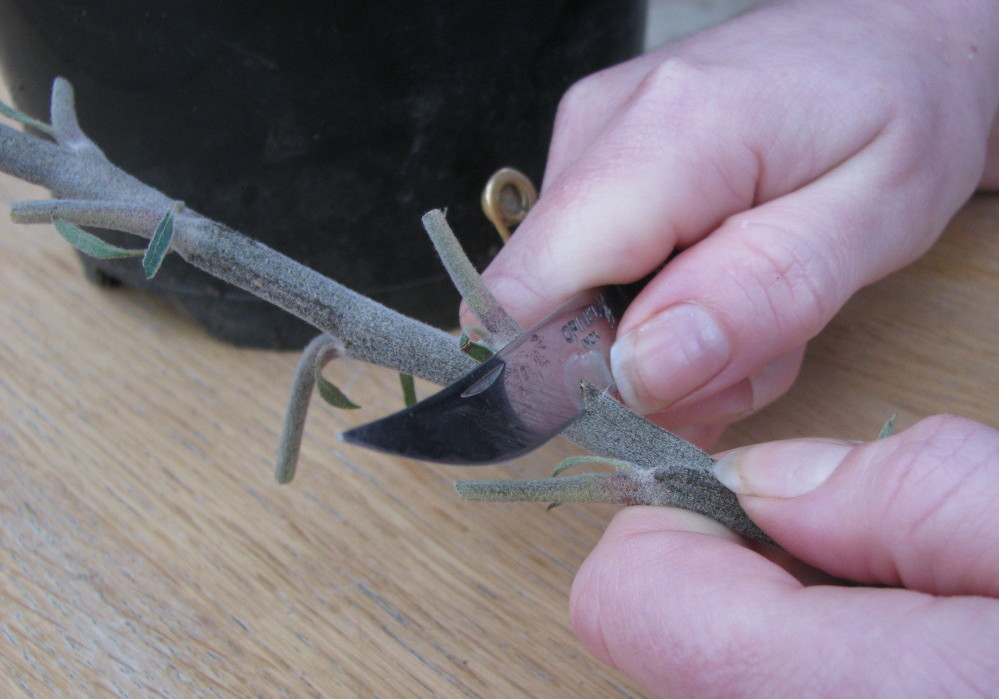
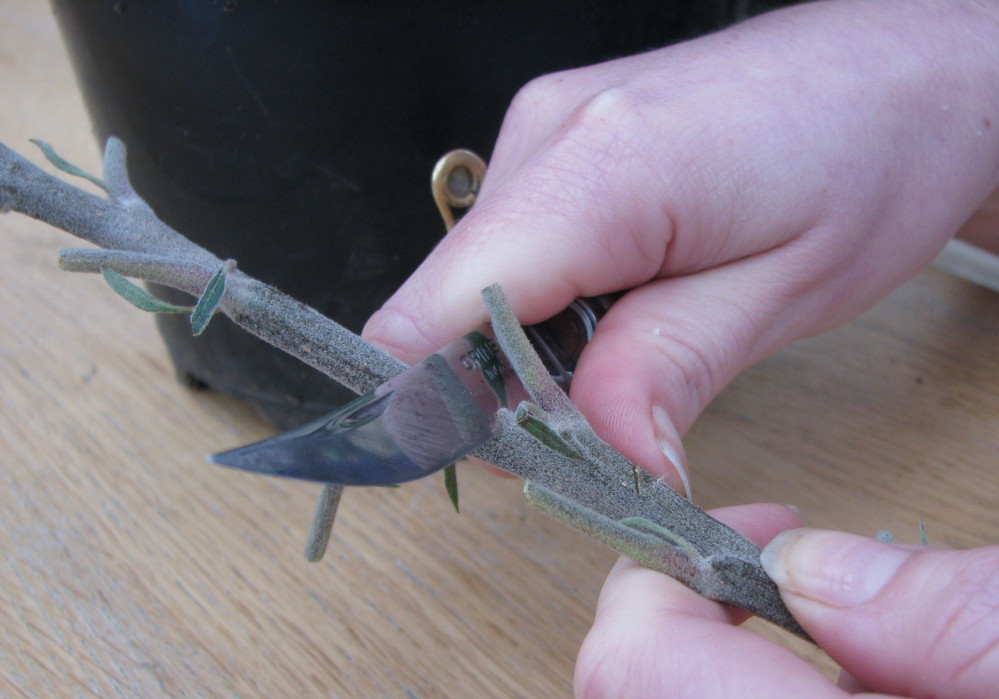
- Make a cut at about 45° down into the scion wood, about an inch below the bud. The cut should be deep enough to go through the rind and slightly into the wood, but not deeper.

Removing the chip for bud grafting
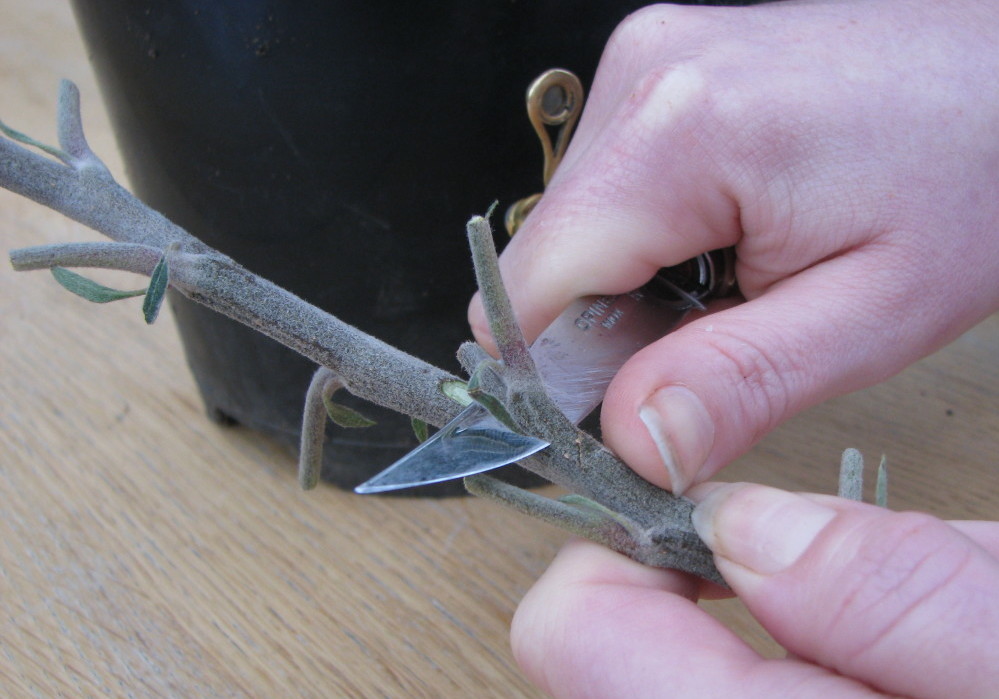
- Remove the knife and do exactly the same about one inch above the same bud.
- From here, carefully draw the knife down behind the bud in a slicing motion making use of the whole length of the knife, until you reach the first cut.
Inserting the bud graft
- Using the leaf stalk as a handle, remove the bud. Be careful not to touch the cut surface as the natural oils and dirt from your skin can interfere with the grafting process of ‘healing’. Carefully, and using the cut out bud as a size guide, take a corresponding slice out of a bare patch of your rootstock.
- Insert the bud slice into the rind gap you have just created in the rootstock. It should be partially held in place by the flap at the bottom that you created with your first 45° slice. Take care to ensure that the cambium layers of the bud and rootstock sections meet, as it is these growing regions that will heal together. Holding the bud carefully in place, press down on the leaf stalk until it breaks off. Its job as a handle is over.
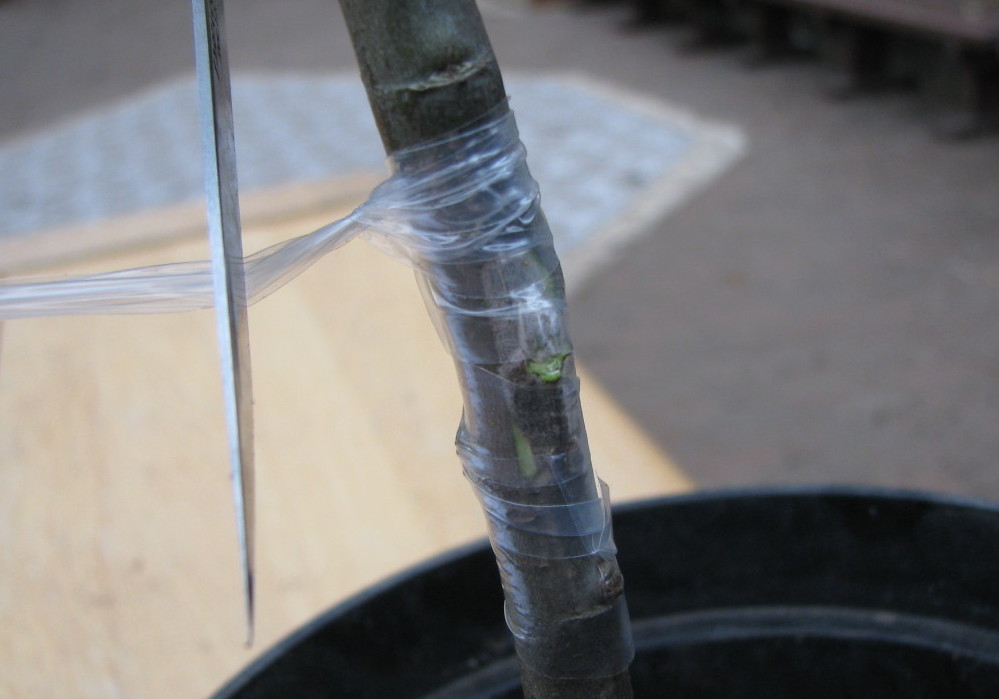
- Starting from the bottom, firmly wrap the bud in place with grafting tape (strips of freezer bag or heavy cling film will work too). Make sure you overlap the tape as you wrap it up, over the bud itself, and right up over the top cut.
- Unless you have self-adhesive grafting tape, tie it off with one or two back hitches. The purpose of binding the graft is twofold; firstly it holds tightly the cambium layers together to ensure good enough contact for healing, and secondly it stops the graft from drying out.
- Label your tree with the variety name, rootstock type, date grafted and how many grafts.
Bud grafting aftercare
The bud graft should heal in the following four weeks, but it is best to keep it wrapped up until the following spring. Before bud burst in spring, carefully remove the binding to see whether it has taken.
If it hasn’t, don’t worry, you still have a viable rootstock that you can bench graft with and have another go.
If it has taken, then cut the top off the rootstock down to just above the bud you have grafted, sloping your cut away from the bud to direct away rain water.
If both your grafts have taken, decide which one looks stronger and cut off the other. If you’re keeping the top graft, flick the lower bud out to stop it growing. Remove any other buds that try to grow from the rootstock.
Bud grafting in photos
1. Growth bud in leaf axil
2. Make a cut at a 45 degree angle, half an inch below your bud
3. Make a cut at a 45 degree angle half an inch above the bud
4. Carefully draw the knife down behind the bud until you reach the first cut

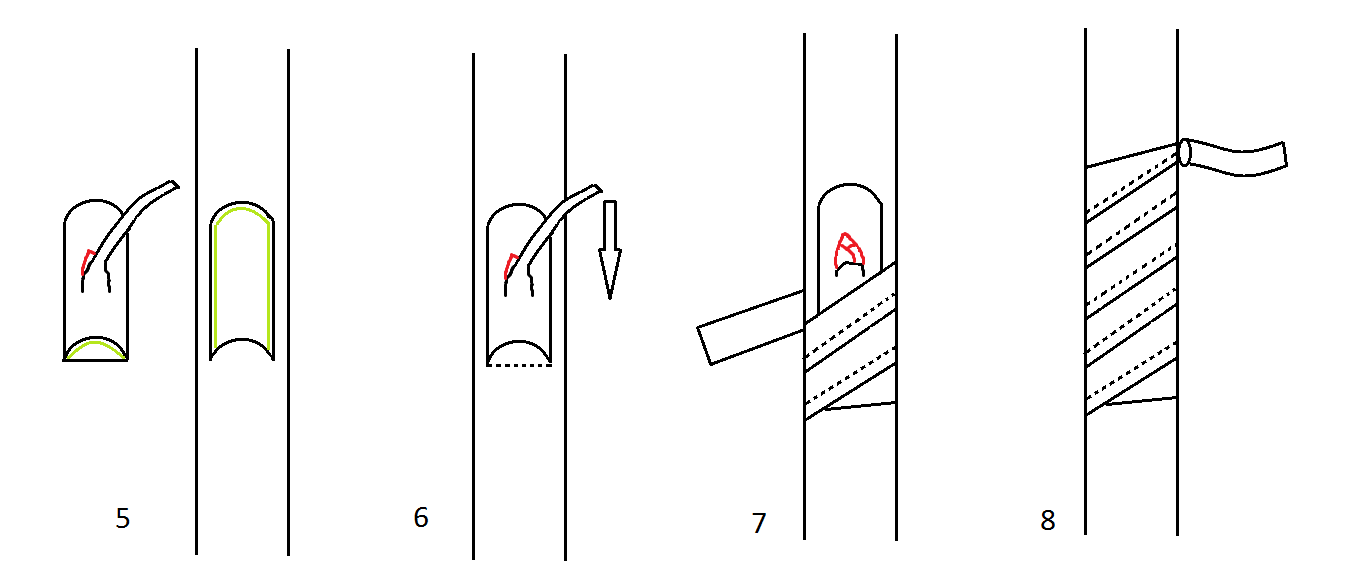
5. Cut a matching section in the rootstock
6. Holding the bud chip and bud in place, pull the leaf stalk down to snap it off.
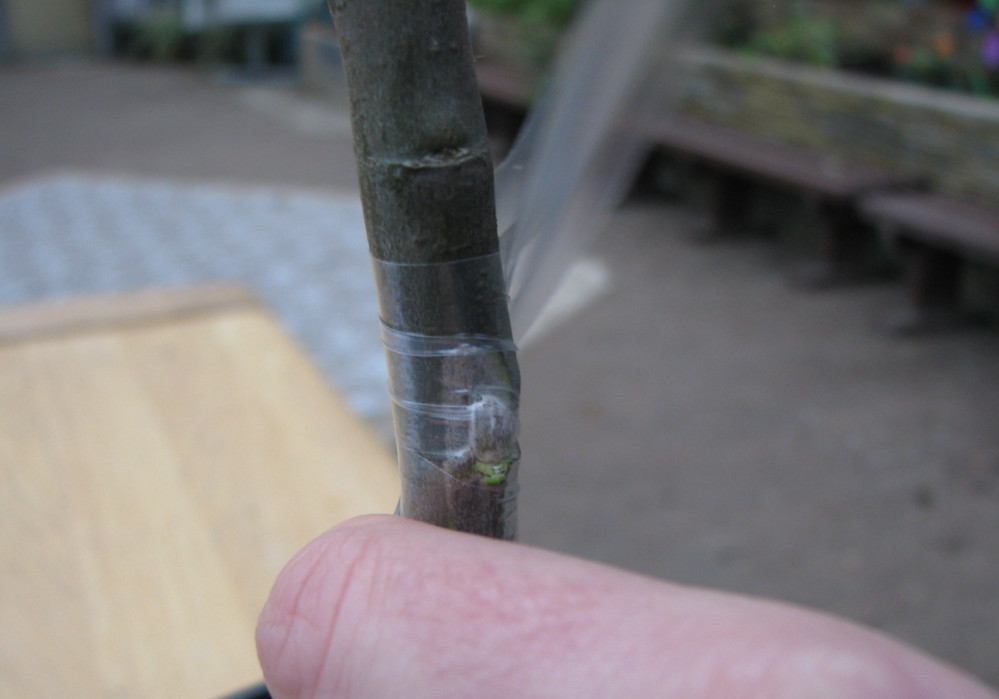
7. Tightly bind your chip in position.
8. Tie off your binding by doubling back with a loop and passing the end through it